
You Make My World Brighter | Altenew Challenge Live! Creative Challenge #58
Hi friends! Today’s card is my take on Jen’s weekly Altenew Challenge Live from 30 June 2026 (Creative Challenge #58). The challenge is to “create a project that features the magic of the evening sky, i.e., stars, constellations, fireworks, and lightshows, etc.”. I have a certain Altenew stamp set that I haven’t used in a few years that I want to utilize on this project, but other than that I’m flying blind! Let’s see how this turns out.

The supplies used:
Altenew – To The Moon Stamp Set
Altenew – Whispers in the Canopy Stamp Set
Altenew – Masking Paper
Altenew – Obsidian Pigment Ink Pad
Simon Says Stamp – Pawsitively Saturated Ink Pads: Flax, Wheat, Fawn
Ranger Ink/Tim Holtz – Distress Ink Pads: Crushed Olive, Evergreen
Bough, Broken China, Faded Jeans, Uncharted Mariner, Black Soot
Spellbinders – Raven Cardstock
Waffle Flower – Background Blender Brushes
Ranger Ink – Glossy Accents
Altenew – 1” x 1/16” Black Instant Dimension Foam Tape
Bearly Art Precision Craft Glue
Creating the Background
For the background panel, I started out with a white piece of cardstock that measured 5” x 7” (it will be trimmed later to measure 4.5” x 6.25”). I placed it in my Altenew Stampwheel 2.0 and placed the solid circle stamp from the Altenew To The Moon stamp set on the upper left corner of my cardstock to start stamping the three layers for the moon. The inks I used were Simon Says Stamp’s Flax for the first moon layer, Wheat for the second layer, and Fawn for the third layer. I stamped the solid circle stamp a second time onto a piece of Altenew’s Masking Paper since I will mask off the moon before I ink blend the night sky. I fussy cut the circle image from the masking paper, removed the backing paper from the mask, and applied it over the moon stamped onto the white cardstock.
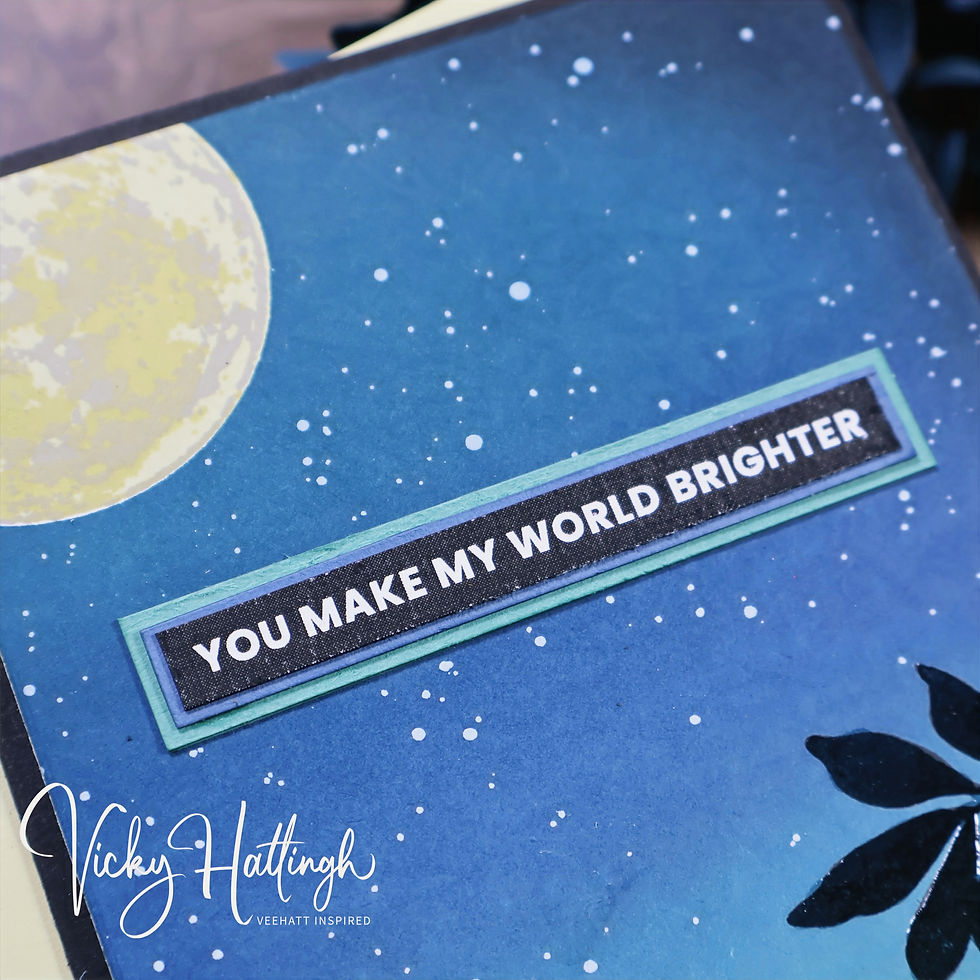
Next, I selected the ink pad colors I will use for my night sky. I decided to go with a rather unusual blend (for me anyway) and decided to use the Ranger/Tim Holtz Distress Ink Pads for the ink blending and the colors were: Crushed Olive, Evergreen Bough, Broken China, Faded Jeans, Uncharted Mariner, and Black Soot. I used the Waffle Flower Background Blender brushes for my background ink blending and started with Crushed Olive to work my way up from the bottom left corner of the cardstock until I reached my final color of Black Soot. For my silhouette image at the bottom of the card, I chose to use the Altenew Whispers in the Canopy stamp set and stamped the large foliage stamp so that it draped over the bottom, right corner of my card front using Altenew Obsidian pigment ink. I mixed a few drops of water with a dab of the Altenew Titanium White Artists’ gouache and spattered it across the background panel with a small paint brush making sure to try and not get too much of it on the silhouette. After the gouache dried, I carefully removed the mask from the moon. Lastly, I applied a thin coat of Ranger’s Glossy Accents to the silhouette leaves to add some depth to what is essentially all but a one-layer card.
Creating the Sentiment
For the sentiment, I chose to use one the Altenew Printable Sentiment Strips that says, “You Make My World Brighter”. I swiped the Distress Ink Faded Jeans ink pad across a scrap piece of white cardstock and did the same with the Evergreen Bough ink pad on another scrap of white cardstock. I added liquid glue to the back side of the sentiment strip and adhered it to the Faded Jeans cardstock and trimmed around the sentiment to give it a thin mat, then stacked the sentiment on top of the Evergreen Bough cardstock and trimmed around it to create a thin mat.

Assembling the Card
I cut a piece of Spellbinders Raven cardstock to measure 9” x 6.25” and scored it down to middle on the long side at 4.5” – this created my A6, side folding card base. I trimmed the inky background to measure 4” x 6” and added strips of Altenew Black Instant Dimension Foam Tape in the 1” size to the back side of the background panel. After removed the adhesive backing, I adhered the background to the center of the card base. With that… this card is completed!
Thank you for stopping by and checking out today’s blog post, I really appreciate it. Until next time, happy crafting!


Comments