Halloween 2022 | Project #5, BOO
- Vicky Hattingh

- Sep 14, 2022
- 3 min read
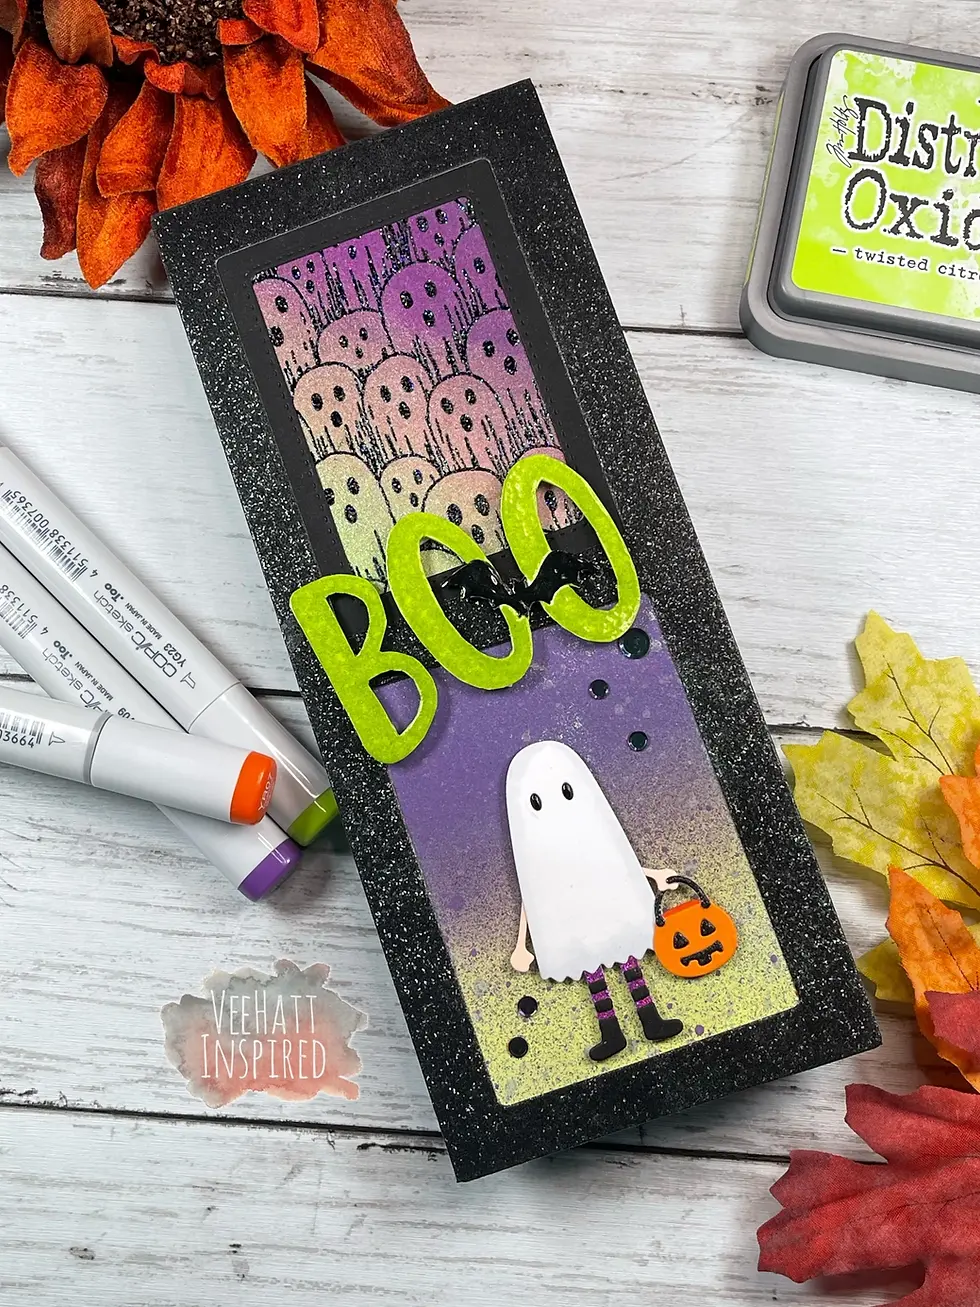
I’m back with another Halloween project! This time I’ve decided to create a slimline card – my first ever slimline card. I found a delightful ghost background stamp from Technique Junkies called #S817 Boo Convention that I wanted to use on one of my cards this year. This is what I created. Enjoy!

I used the Whimsy Stamps “Slimline ATC Windows” die set (the largest rectangular die and the next to the largest die in the set) and used them to cut my frame from black glitter cardstock. Then using the largest double-stitched ATC die from the set, I cut a small frame for the top window of the card using Cardstock Warehouse’s Sirio Ultra Black cardstock. Now to prepare my two backgrounds for the windows.
I grabbed a 4”x5” piece of Strathmore Hot Press Watercolor Paper and also Ranger’s Distress Mica Stains in Bubbling Cauldron and Fortune Teller and was off to the splat box. I very lightly misted the cardstock with water using my Distress Sprayer, then heavily sprayed the cardstock with both colors of the Mica Stain. I allowed the two colors to mix together slightly, but evenly, and then used the Ranger Heat Tool to completely dry the cardstock. I set this aside while I moved onto my other cardstock panel for the lower window of the card.
Using another piece of 4” x 5” watercolor paper, I blended Tim Holtz’s Ranger Distress Oxide, Villainous Potion and Twisted Citron, using a blending brush until I achieved the balance of the two colors I was happy with – then dried the inks with my heat tool. Once the ink was dry, I went back to the splat box and heavily splattered the cardstock panel with the Distress Mica Stains in the Bubbling Cauldron and Fortune Teller colors. This too was set aside to dry.

I used Altenew Clear Embossing Ink and the Technique Junkies “Boo Convention” background stamp and stamped the image onto the watercolor cardstock for the top window (the cardstock that was only sprayed with the two Mica Stains). I then coated the cardstock with a generous amount of Brutus Monroe “Raven Sparkle” Embossing Powder and gently tapped off the excess and melted the embossing powder with my heat embossing gun. Next, I trimmed this panel down to fit the frame for the top window of the card and glued it into place with Distress Collage Medium Matte adhesive.
For the bottom window of the card, I die cut all the necessary pieces for the ghost trick-or-treater from the Spellbinders “Eek-a-Boo” die set and glued the elements together, using the product packaging as a guide, to create the cutest little ghost figure. I used the C2 Copic alcohol marker to shade the white portions of the ghost and colored his little eyes with a black Glaze pen to make them shine.

Next, I took the Distress Oxide ink blended cardstock panel and trimmed it down so that is fit the lower window of the card front and glued it into place with the Distress Collage Medium Matte adhesive. I adhered the ghost trick-or-treater to the ink blended panel with Simon Says Stamp 3D Foam Squares and also glued some Studio Katia “Black Magic” Confetti around it for additional interest.
For the sentiment, I stamped the large Boo greeting from the Simon Says Stamp “Spook Up Some Fun” stamp set using Altenew Clear Embossing Ink, applied a layer of Wow! Lime Rickey embossing powder, tapped off the excess, and heat set the embossing powder with my heat gun. After it cooled, I began to fussy-cut around the greeting and used a PenBlade craft knife to cut out the insides of the “O”s. Once that was completed, I used Nuvo Crystal Drops in a Gloss-Ebony Black color to make the bat black and add some glossy dimension. I used Simon Says Stamp’s 3D Foam Squares to add the sentiment to the middle section of the card and that completes this project.
Thank you so much for stopping by to see me – I appreciate you doing so!
Until next time…


Comments